How to screen record your iPhone using a Mac
Recording an iPhone screen from a Mac is the easiest way to capture a clean, high-resolution video of an iOS app or workflow. Unlike the built-in iOS screen recorder, recording through a Mac avoids the on-screen recording indicator, gives you a larger preview while you record, and lets you edit the result in any Mac video tool.
This guide covers the three common ways to screen record your iPhone using a Mac: the on-device iOS recorder, QuickTime Player on Mac, and using Tight Studio to capture a mirrored iPhone window with zoom and cursor effects layered on top.
Method 1: Use the built-in iOS Screen Recording on iPhone
If you just need a quick recording and do not need to involve the Mac at all, the iOS Screen Recording control is the fastest path.
- Open Settings > Control Center on your iPhone
- Tap the + next to Screen Recording to add it to Control Center
- Swipe down from the top-right corner to open Control Center
- Long-press the Screen Recording button to choose whether to record microphone audio
- Tap Start Recording, wait for the 3-second countdown, then use your app
- Tap the red status indicator at the top of the screen and choose Stop to finish
The recording saves to your Photos app. You can then AirDrop it to your Mac for editing.
Limitation: the iOS recorder leaves a small red recording indicator visible in the status bar, and the resolution and bitrate are fixed. There is no zooming, no cursor highlight, no captions, and trimming is limited to the start and end of the clip.
Method 2: Record your iPhone screen with QuickTime Player on Mac
QuickTime Player is built into every Mac and can record an iPhone screen directly over a USB cable. The output is full-resolution, with no on-screen indicator on the phone.
- Connect your iPhone to your Mac with a USB-to-Lightning or USB-to-USB-C cable
- Unlock the iPhone and tap Trust when prompted
- Open QuickTime Player on the Mac
- Choose File > New Movie Recording from the menu bar
- Click the dropdown arrow next to the red record button
- Under Camera, pick your iPhone. Under Microphone, pick your iPhone if you want to capture audio from the phone, or your Mac microphone if you want to narrate
- Click the red Record button to start, and click it again to stop
- Choose File > Save and pick a location
The result is a .mov file at your iPhone’s native resolution. You can trim it inside QuickTime (Edit > Trim) or open it in any video editor.
Limitation: QuickTime captures the raw screen feed, but it does not zoom, highlight the cursor (there is no cursor on a touch device), or add captions. If you want a polished tutorial-style recording, you will want to edit the QuickTime output in a dedicated video tool.
Method 3: Mirror your iPhone to your Mac and record with Tight Studio
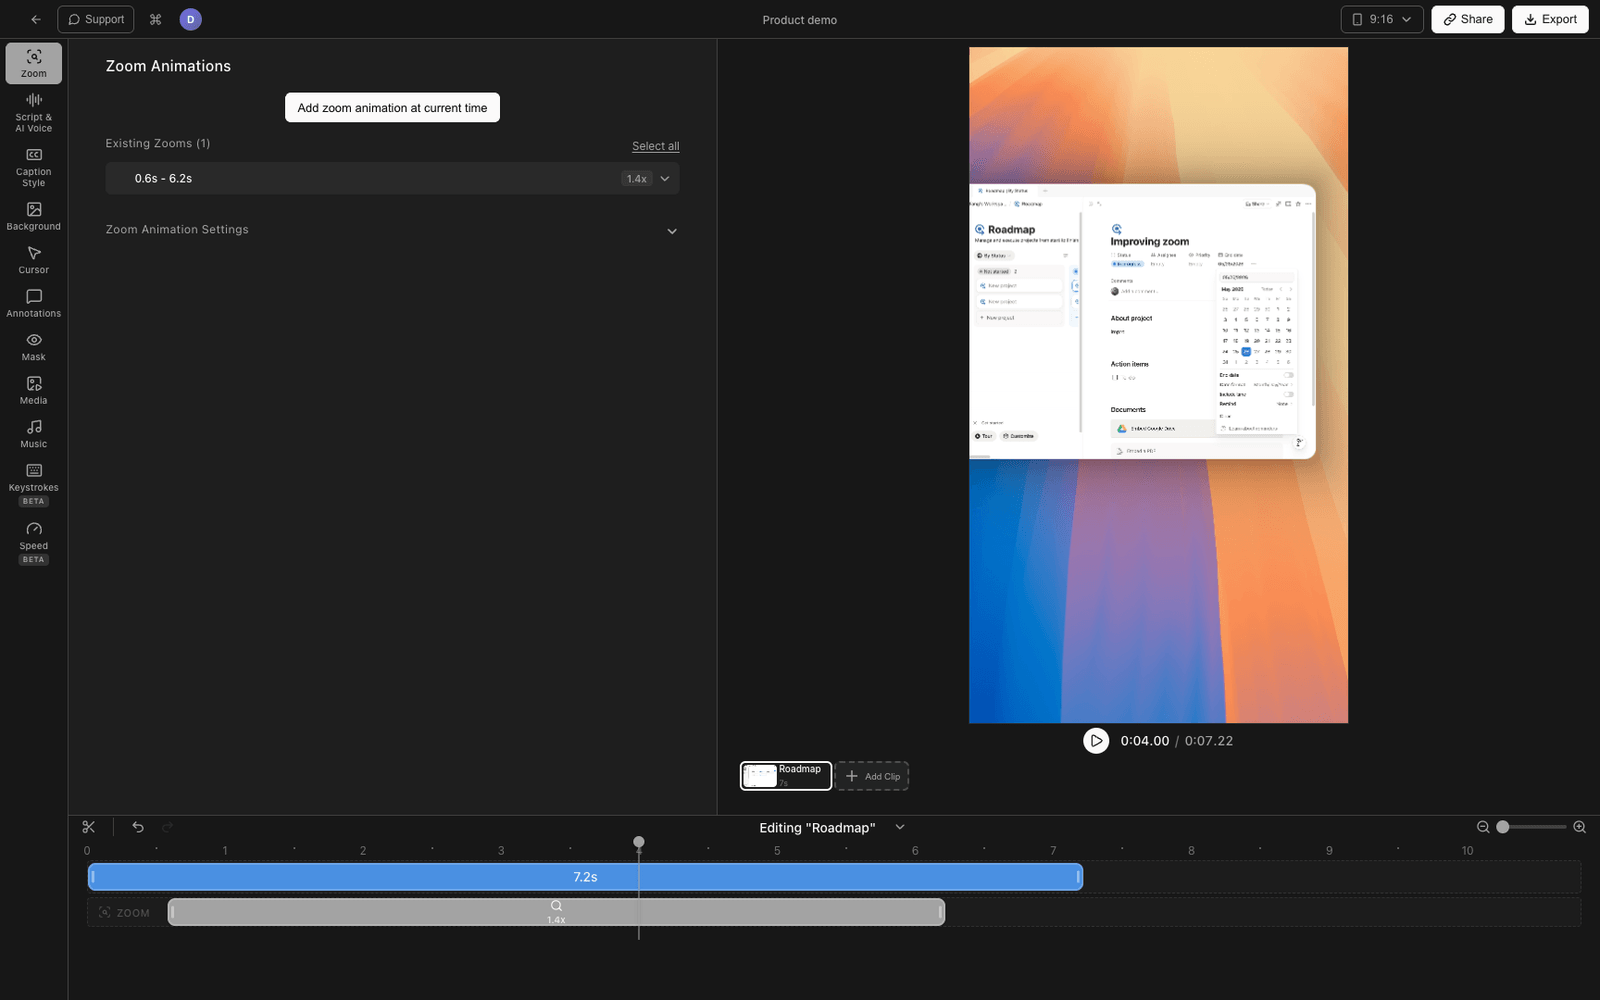
Tight Studio records the Mac screen, so the trick for iPhones is to first mirror your iPhone onto the Mac (using QuickTime or a screen mirroring app), then record that window with Tight Studio. This gives you everything in Method 2 plus auto zoom on taps, a webcam bubble of you reacting, AI captions, and a built-in editor.
- Open QuickTime Player > File > New Movie Recording and select your iPhone as the camera (as in Method 2). Position the iPhone preview window where you want it on screen.
- Download Tight Studio and open the app
- Choose Window mode and pick the QuickTime “Movie Recording” window so Tight Studio captures just the iPhone screen
- Optionally turn on your microphone to narrate and your webcam for a camera bubble
- Click Record to start, and use your iPhone as normal
- When you stop, your recording opens in the built-in editor where you can trim, add zoom effects on taps, and generate captions
What Tight Studio adds for iPhone recordings
- Auto zoom - Zooms into the part of the screen where the tap happened, so viewers can see small UI elements clearly
- AI voiceover - Generate a clean narration from a script if you do not want to record your own voice
- AI captions - One-click captions in multiple styles, useful for muted social previews of iPhone app demos
- Webcam overlay - Add a camera bubble in any shape or position
- Intro and outro slides - Add branded intro/outro screens to make the recording feel like a real product video
- Shareable links - Share the finished recording with a link without uploading the file anywhere
Comparing iPhone screen recording methods
| Feature | iOS Screen Recording | QuickTime on Mac | Tight Studio (via mirror) |
|---|---|---|---|
| Records on Mac | No | Yes | Yes |
| Cable required | No | Yes (USB) | Yes (USB, via QuickTime) |
| On-screen recording indicator | Yes | No | No |
| Microphone audio | Yes | Yes | Yes |
| Auto zoom on taps | No | No | Yes |
| Webcam overlay | No | No | Yes |
| AI captions | No | No | Yes |
| AI voiceover | No | No | Yes |
| Editing | Trim only | Trim only | Full video editor |
| Shareable link | No | No | Yes |
| Price | Free | Free | Free tier available |
Frequently asked questions
Can I screen record my iPhone using my Mac?
Yes. Connect your iPhone to your Mac with a USB cable, open QuickTime Player, choose File > New Movie Recording, then click the dropdown next to the record button and select your iPhone as the camera. Click the red button to start recording and again to stop. QuickTime saves the recording as a .mov file at your iPhone’s native resolution.
How do I record my iPhone screen with audio on Mac?
In QuickTime, after choosing File > New Movie Recording, click the dropdown arrow next to the red record button and pick your iPhone under both Camera and Microphone. Picking the iPhone as the microphone captures the audio coming from the phone itself (music, app sounds, voice calls if the other party allows it). Pick your Mac mic instead if you want to narrate over the recording.
Why is QuickTime not recognizing my iPhone?
This is usually a trust or cable issue. Make sure the iPhone is unlocked, you tapped Trust This Computer on the iPhone, and you are using a data-capable cable (some cheap cables are charge-only). If it still does not appear, try a different USB port, restart QuickTime, or reboot the iPhone.
Do I need a cable to record my iPhone screen on Mac?
For QuickTime and Tight Studio, yes - a USB cable is the simplest path and works reliably. Wireless mirroring is possible with paid third-party apps (Reflector, LonelyScreen, AirServer), but they add latency and occasional quality loss. The built-in iOS Screen Recording works wirelessly without a Mac at all, but only on the phone itself.
How do I record a FaceTime or phone call from iPhone?
iOS blocks audio capture during FaceTime and phone calls for privacy reasons. You can record the video portion using QuickTime or the built-in recorder, but the audio from the other party will be muted in the recording. If you need a call recording, both participants need to use a tool that supports it (and you must have consent).
What is the best resolution for iPhone screen recording on Mac?
QuickTime and Tight Studio both capture at your iPhone’s native screen resolution, which is typically 1170x2532 or higher on modern iPhones. For sharing on social media, you usually do not need to downscale - vertical iPhone recordings are already in the right aspect ratio for TikTok, Reels, and Shorts. Trim the start and end in your editor and export at the source resolution.