
Style, position, resize, and mirror the camera
Control camera placement, size, crop, shape, corner roundness, and mirroring.
Before you start
Camera styling is available when the selected clip contains camera footage. Open Layout & Avatar and choose a layout that shows the camera before adjusting its appearance.
Layout choices control the broad camera position. Shape, roundness, size, crop, and mirroring refine the camera after it has been placed.
- Panel
- Layout & Avatar
- Required
- A clip recorded with camera footage
- Applies to
- The active clip and its compatible layouts
Follow these steps
- Step 1
Choose a camera position
Open Layout & Avatar, then choose a preset under Camera Side-by-side, Camera in Corner, Camera Primary, or Camera Hidden. Corner Overlay presets place the camera over the screen; side-by-side presets reserve separate space for both sources.
Use the live canvas to make sure the camera does not cover important controls or captions.
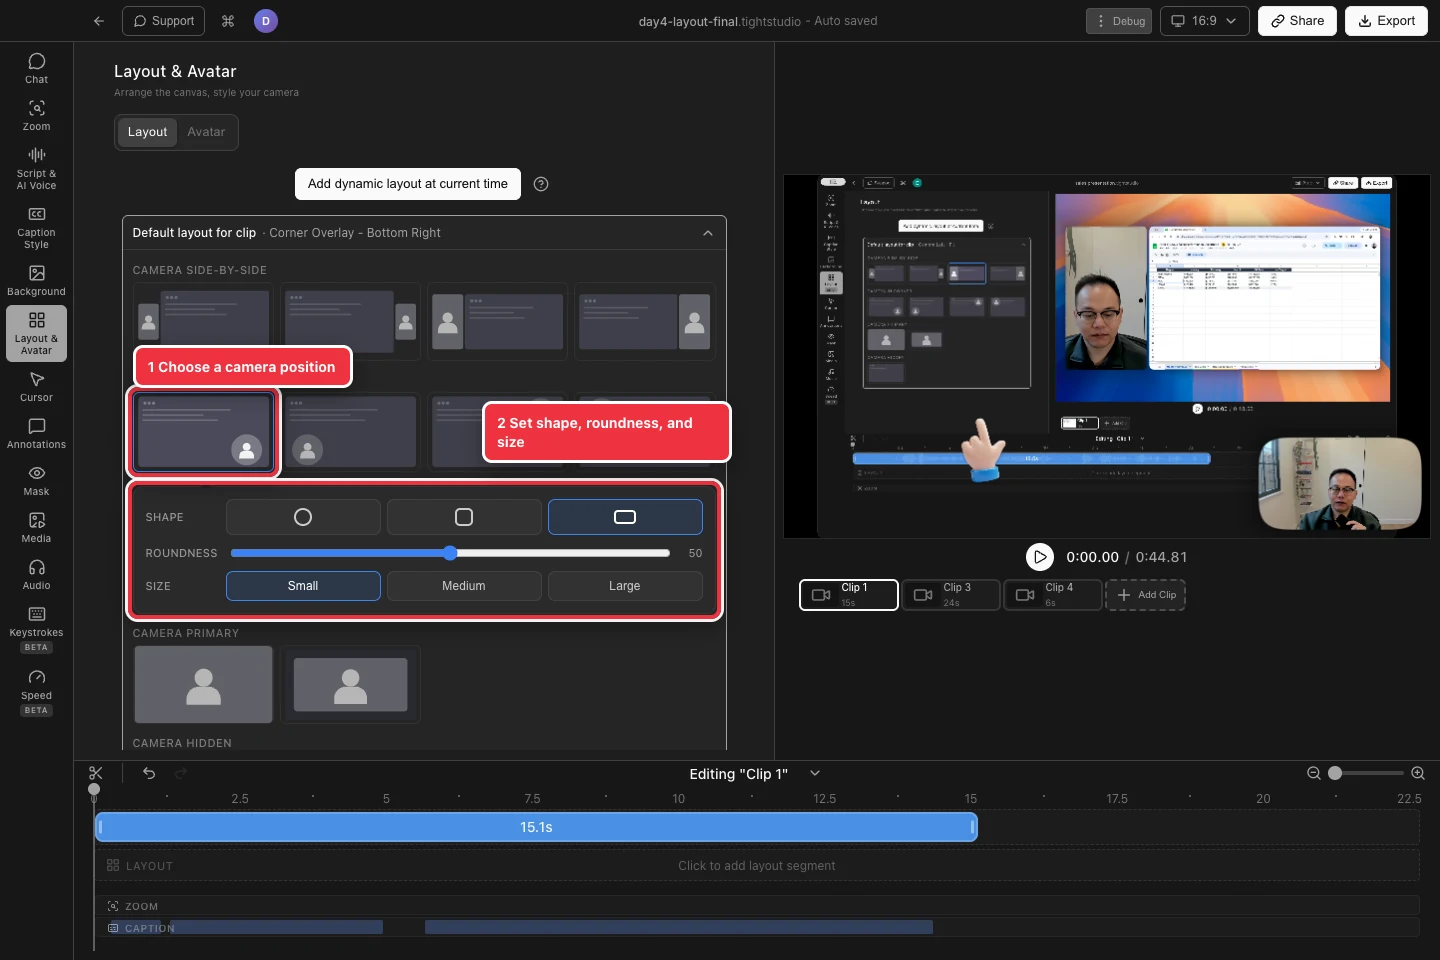
Choose a compatible layout, then refine the camera with the controls shown below it. - Step 2
Choose the camera shape and corner roundness
For picture-in-picture layouts, choose Round, Rounded Square, or Rounded Rectangle under Shape. Roundness appears for the square and rectangle choices and controls how soft their corners look.
A fully round camera is useful for small overlays; a rounded rectangle preserves more of a wide camera frame.
- Step 3
Set camera size and crop
Choose Small, Medium, or Large under Size. Tight Studio keeps the camera inside its selected corner as it changes size.
Camera crop depends on the selected layout and shape. Fit-style layouts preserve more of the source, while Cover-style layouts fill the available frame and may crop its edges.
- Step 4
Mirror the camera when needed
Open the Avatar subtab and turn Mirror camera on to flip the camera left to right. This can make the recorded view feel like a familiar webcam preview.
Mirroring changes the camera image, not the recorded screen. Review any text visible in the camera because it will also be reversed.
- Step 5
Review every clip and zoom
Play through the clip and inspect camera position at different zooms and dynamic layouts. A camera can use a smaller size while the screen is zoomed so it does not hide the focal area.
Repeat the check for each camera clip in a multi-clip project because its layout and camera size can differ.
Troubleshooting
Why can’t I see camera controls?
Select a clip that includes camera footage, then choose a layout that displays the camera. Screen-only and Camera Hidden layouts do not expose picture-in-picture styling controls.
Why is part of my camera cropped?
The selected layout or shape may use Cover behavior. Choose a Fit preset, a wider shape, or a larger camera size to preserve more of the original frame.
Why did my camera move during the clip?
A dynamic layout or zoom-specific camera-size setting is overriding the default. Inspect the Layout and Zoom tracks at that time.
Still stuck?
Send us a note with the project name and the step where you got blocked.