
Improve export performance and resolve failures
Prepare for longer exports, choose a practical resolution, and diagnose failed renders.
Before you start
Export time grows with project duration, output resolution, effects, captions, overlays, and source-media complexity. Keep Tight Studio open and prevent the Mac from sleeping during a long render.
The current Export dialog does not include Copy current frame or a still-image format. To save one frame, export a video first and copy or capture the exact frame from a video player.
Good export performance depends on disk space and keeping Tight Studio open through long exports; an export failure can also occur if the Mac sleeps.
- Faster choice
- Video 1080p
- Highest resolution choice
- Video 4K
- Required storage
- Destination space plus working space
Follow these steps
- Step 1
Prepare the project for a reliable export
Play through the full timeline and fix missing media before exporting. Close other graphics-heavy apps, connect power for a long project, and make sure the chosen destination has generous free space.
Use a local folder when possible. External or network destinations can add another point of failure while a large file is being written.
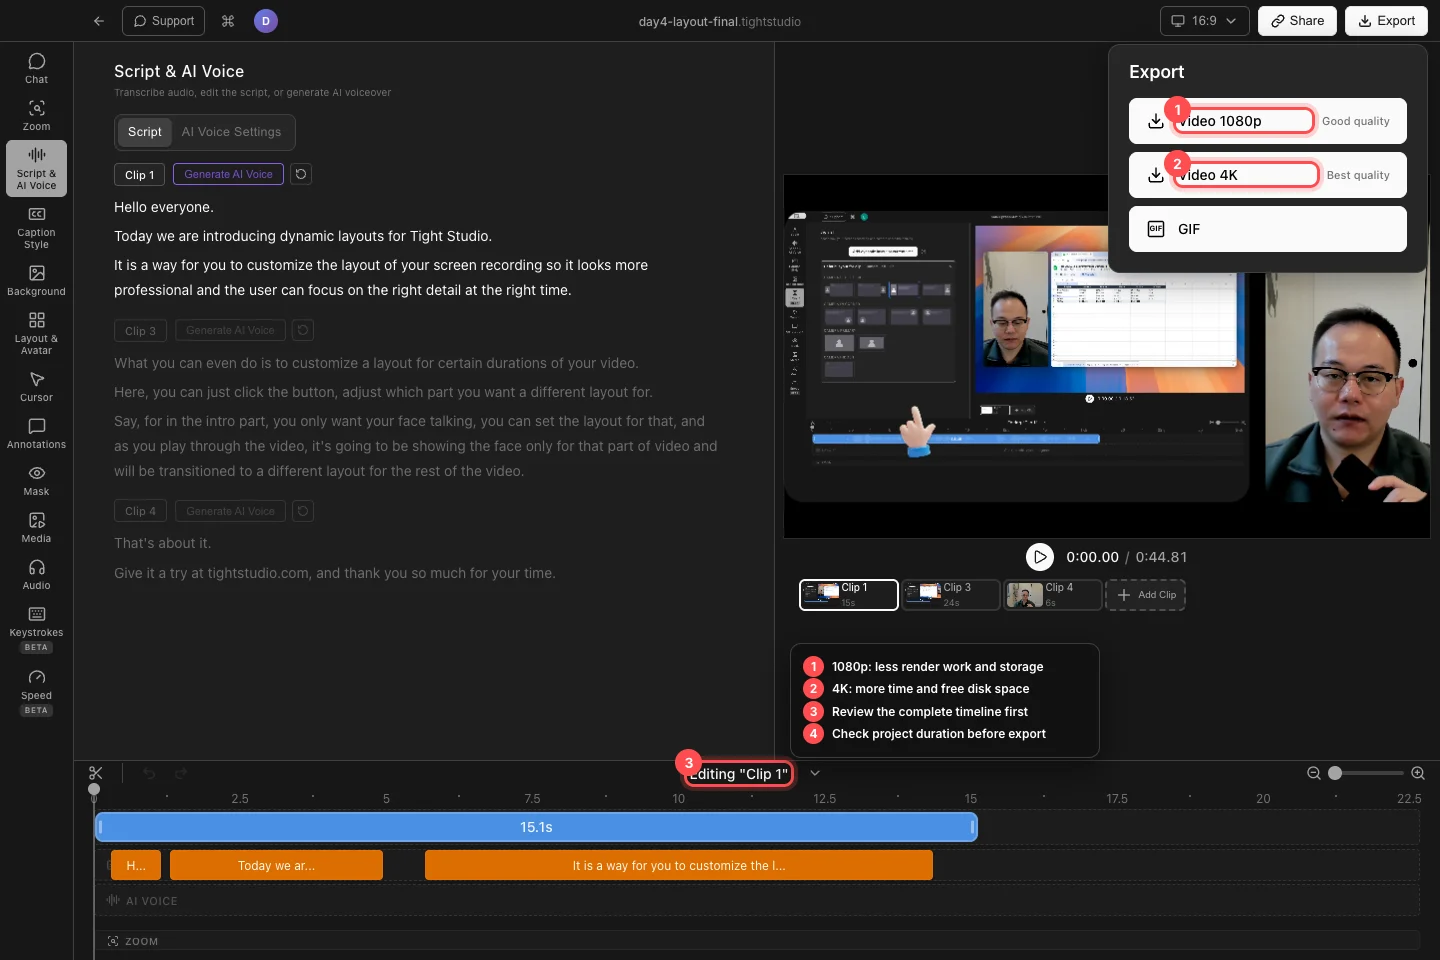
Check the complete timeline, then choose 1080p for less work or 4K when the extra resolution is necessary. - Step 2
Choose a practical resolution
Click Export and use Video 1080p when turnaround time and file size matter most. Use Video 4K for Best quality when the project and destination benefit from it and the Mac has enough time and storage.
The menu has no separate quality slider. Changing between 1080p and 4K is the current control for the video quality and performance tradeoff.
- Step 3
Let the render finish or retry a failure
After choosing a save location, watch the Exporting... status. Tight Studio saves an export snapshot, so you may keep editing without changing that in-progress render, but leave the app running until Export complete! appears.
If the dialog says the export failed, click Retry export. Use Show details when support needs the technical error, and try a local folder with more free space before repeating a large 4K render.
- Step 4
Verify the output before sharing
Open the complete video and inspect its start, transitions, audio, and ending. Confirm it is sharp, correctly cropped, synchronized, and free of editor controls.
Keep the project and its source media until the delivered video has been approved. A successful export does not replace a project backup.
Troubleshooting
Why is a 4K export taking much longer than expected?
4K renders more pixels than 1080p and complex effects, overlays, captions, or long timelines add work. Leave Tight Studio open, prevent sleep, close graphics-heavy apps, or use Video 1080p when 4K is unnecessary.
Why does the export fail or stop before completion?
Confirm the project contains exportable content, save to a local folder with more free space, and click Retry export. Open Show details and include that information when contacting Support if the same project fails again.
Where is Copy current frame?
It is not currently exposed in the Tight Studio Export dialog. Export an MP4 and copy or capture the paused frame in a video player for the best result, or use Shift-Command-4 on the editor preview for a quick lower-resolution image.
Still stuck?
Send us a note with the project name and the step where you got blocked.