
Grant screen, camera, microphone, and accessibility permissions
Allow the macOS access Tight Studio needs to record the screen, sound, camera, cursor, and input.
Before you start
Tight Studio asks for Screen Recording and Accessibility access when the app starts. Camera and Microphone access are requested later, only when you use those inputs in the recording controls.
Keep Tight Studio open while you approve access in System Settings. If macOS asks you to quit and reopen the app, accept the prompt, then launch Tight Studio again.
- Required at startup
- Screen Recording and Accessibility
- Requested when used
- Camera permission and Microphone permission
- macOS location
- System Settings > Privacy & Security
Follow these steps
- Step 1
Open Tight Studio and review Permissions Required
When either startup permission is missing, Tight Studio opens the Permissions Required window automatically.
The window lists Screen Recording Permission and Accessibility Permission. Continue remains unavailable until both rows show Granted.
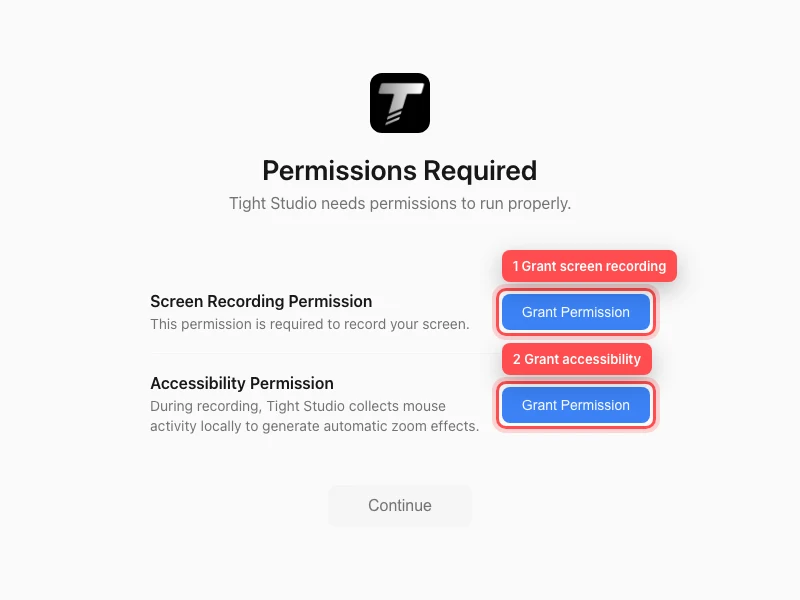
Grant both startup permissions before selecting Continue. - Step 2
Grant Screen Recording access
Next to Screen Recording Permission, select Grant Permission. Tight Studio opens System Settings to Privacy & Security > Screen & System Audio Recording. On some earlier macOS versions, this section is named Screen Recording.
Turn on Tight Studio. This access lets the app capture the display, a window, or a selected area, including the system audio that macOS exposes with screen capture.
- Step 3
Grant Accessibility access
Return to the Permissions Required window and select Grant Permission next to Accessibility Permission.
In System Settings > Privacy & Security > Accessibility, turn on Tight Studio. Tight Studio uses this access to collect mouse movement and clicks locally while recording so it can generate automatic zoom effects.
- Step 4
Wait for both rows to show Granted
Return to Tight Studio. The permission window checks the two settings automatically; each Grant Permission button changes to Granted after access is detected.
When Continue becomes available, select it to open the recording controls.
- Step 5
Allow camera access when you add a camera
In the recording controls, find the Camera row and select Allow camera access. In the macOS privacy prompt, select Allow.
After access is granted, choose a camera from the Select camera menu. If you previously denied access, open System Settings > Privacy & Security > Camera and turn on Tight Studio.
- Step 6
Allow microphone access when you add narration
In the Microphone row, select Allow microphone access. In the macOS privacy prompt, select Allow, then choose an input from the Select microphone menu.
If you previously denied the prompt, open System Settings > Privacy & Security > Microphone and turn on Tight Studio. You can select No microphone selected when you do not want to record narration.
Troubleshooting
Why is Continue still disabled?
Both Screen Recording Permission and Accessibility Permission must show Granted. Check that Tight Studio is enabled in both Privacy & Security sections, return to the app, and wait a moment for the status to refresh. If macOS requested a restart, quit and reopen Tight Studio.
Why is Tight Studio missing from a permission list in System Settings?
Return to Tight Studio and select the matching Grant Permission, Allow camera access, or Allow microphone access control again. macOS normally adds an app to a privacy list after the app requests that access.
Why is the screen blank or the camera or microphone unavailable after I enabled access?
Quit and reopen Tight Studio so macOS can apply the updated privacy setting, then open the recording controls again. Also confirm that the intended camera or microphone is connected and selected.
What if the permission switch is locked or cannot be changed?
A Screen Time restriction or an organization-managed privacy profile may prevent changes. Ask the Mac owner or administrator to allow Tight Studio in the relevant Privacy & Security section.
Still stuck?
Send us a note with the project name and the step where you got blocked.