
Export a video, 4K file, or GIF
Choose an export format and quality, understand watermarks, and save the finished file.
Before you start
Preview the whole project once before exporting. Tight Studio exports the kept video segments and media on the video track, using the current canvas, layout, captions, audio, and effects.
The current Export menu offers Video 1080p, Video 4K, and GIF. You choose the filename and save location in the system save dialog after choosing a format.
- Video 1080p
- Good quality
- Video 4K
- Best quality
- GIF
- Looping image animation
- Save location
- Chosen in the macOS save dialog
Follow these steps
- Step 1
Review the finished project
Play from the beginning to the end and check clip cuts, canvas framing, captions, overlays, and audio. Make sure the timeline contains a kept video segment or visual media to export.
If you use AI voice on a free account, resolve the on-screen watermark notice before continuing: upgrade for a clean export or choose Turn off AI voice. The notice is specific to an active AI voice track.
- Step 2
Open Export and choose a format
Click Export in the upper-right corner. Choose Video 1080p for Good quality, Video 4K for Best quality, or GIF for a looping animation without a video container.
1080p is the practical default for web sharing. Choose 4K when the source and final viewing size benefit from the extra resolution; choose GIF for short, lightweight visual loops.
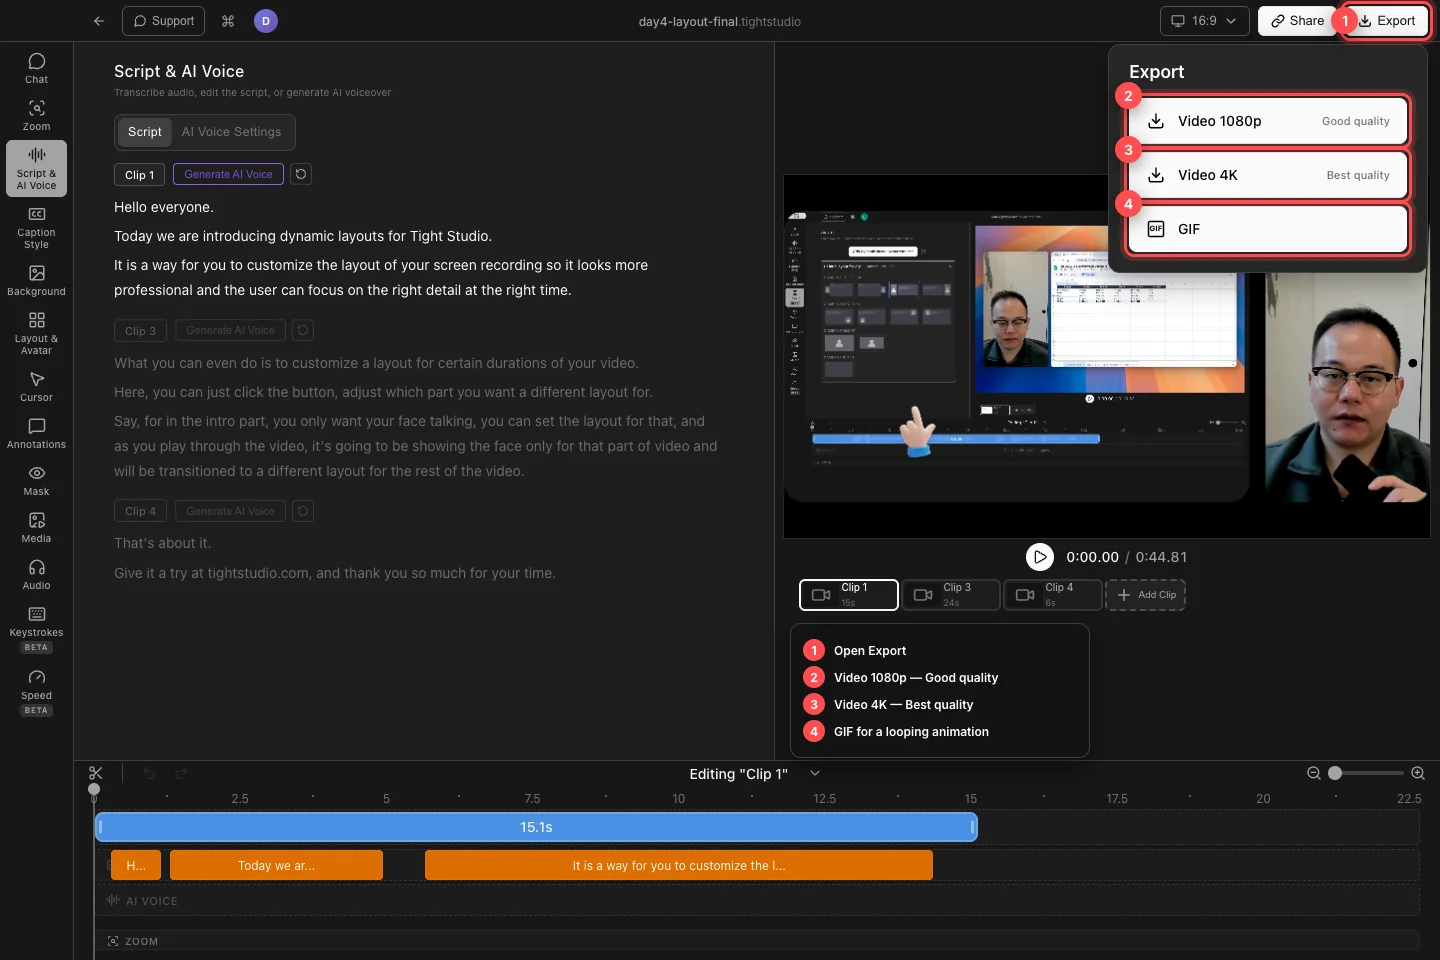
Open Export, then choose 1080p, 4K, or GIF for the way the finished work will be used. - Step 3
Name the file and choose where to save it
In the macOS save dialog, enter a filename and choose a folder with enough free space. Video exports use MP4 and GIF exports use GIF; Tight Studio suggests the project name as the filename.
Choose Save to start. Remember the selected folder so you can find the finished file without starting another export.
- Step 4
Monitor the export
For video, the dialog changes to Exporting... and saves an export snapshot. You can continue editing while that render is in progress; those later edits do not change the snapshot already being exported.
A GIF moves through preparation, rendering, and conversion stages. Leave Tight Studio open until the dialog reports Export complete! or GIF export complete!. Use Cancel export only when you want to stop the current render.
- Step 5
Open and check the finished file
Open the saved MP4 or GIF and inspect the beginning, a few transitions, and the ending. Confirm the dimensions and visual quality suit the destination.
If you need a different balance of size and detail, export again with Video 1080p or Video 4K. Tight Studio does not expose a separate quality slider in the current Export menu.
Troubleshooting
Why does Export say there is no exportable content?
Add or restore a kept video segment or media on the video track. A project with only empty tracks has nothing for the exporter to render.
Why does my AI voice export show a watermark notice?
A free-tier project with an active AI voice clip requires the watermark. Choose Upgrade to Pro for a clean export or Turn off AI voice before exporting; this notice does not mean every free export has the same watermark condition.
Why can’t I find the exported file?
Check the folder chosen in the macOS save dialog and search for the project name with an .mp4 or .gif extension. Export again only if the dialog never reached its completion message.
Still stuck?
Send us a note with the project name and the step where you got blocked.