
Style and position captions
Use presets and detailed controls to fit captions to each canvas and layout.
Before you start
Caption appearance is a project-level setting. The chosen preset and custom values apply to captions throughout the project, while the transcript itself stays attached to each clip.
You can design captions before transcription by using the sample preview in Custom Style, but you will not see captions on the video until the active clip has transcript segments and captions are enabled.
- Editor tab
- Caption Style
- Fast setup
- Preset Style
- Detailed setup
- Custom Style
- Hide without deleting
- Disabled preset or Hide Captions
Follow these steps
- Step 1
Start with a caption preset
Click Caption Style in the left sidebar and open Preset Style. Choose Disabled, Professional, Clean & Modern, Bold & Dramatic, Hormozi, Ali, Typewriter, Terminal, Editorial, or Glass.
A preset applies a coordinated font, colors, word grouping, active-word treatment, background treatment, position, and motion effect. Preview the project after choosing one because the same preset can read differently on a horizontal and vertical canvas.
- Step 2
Set the font and words shown
Open Custom Style. Under Font Type, choose a font, then adjust Font Size. Use Display Word Count to choose 1-2 words, 3-5 words, 4-6 words, 6-8 words, or Full sentence.
Short groups create faster visual changes and suit narrow canvases. Full sentence preserves more context but needs more room, so check long segments for wrapping or overlap.
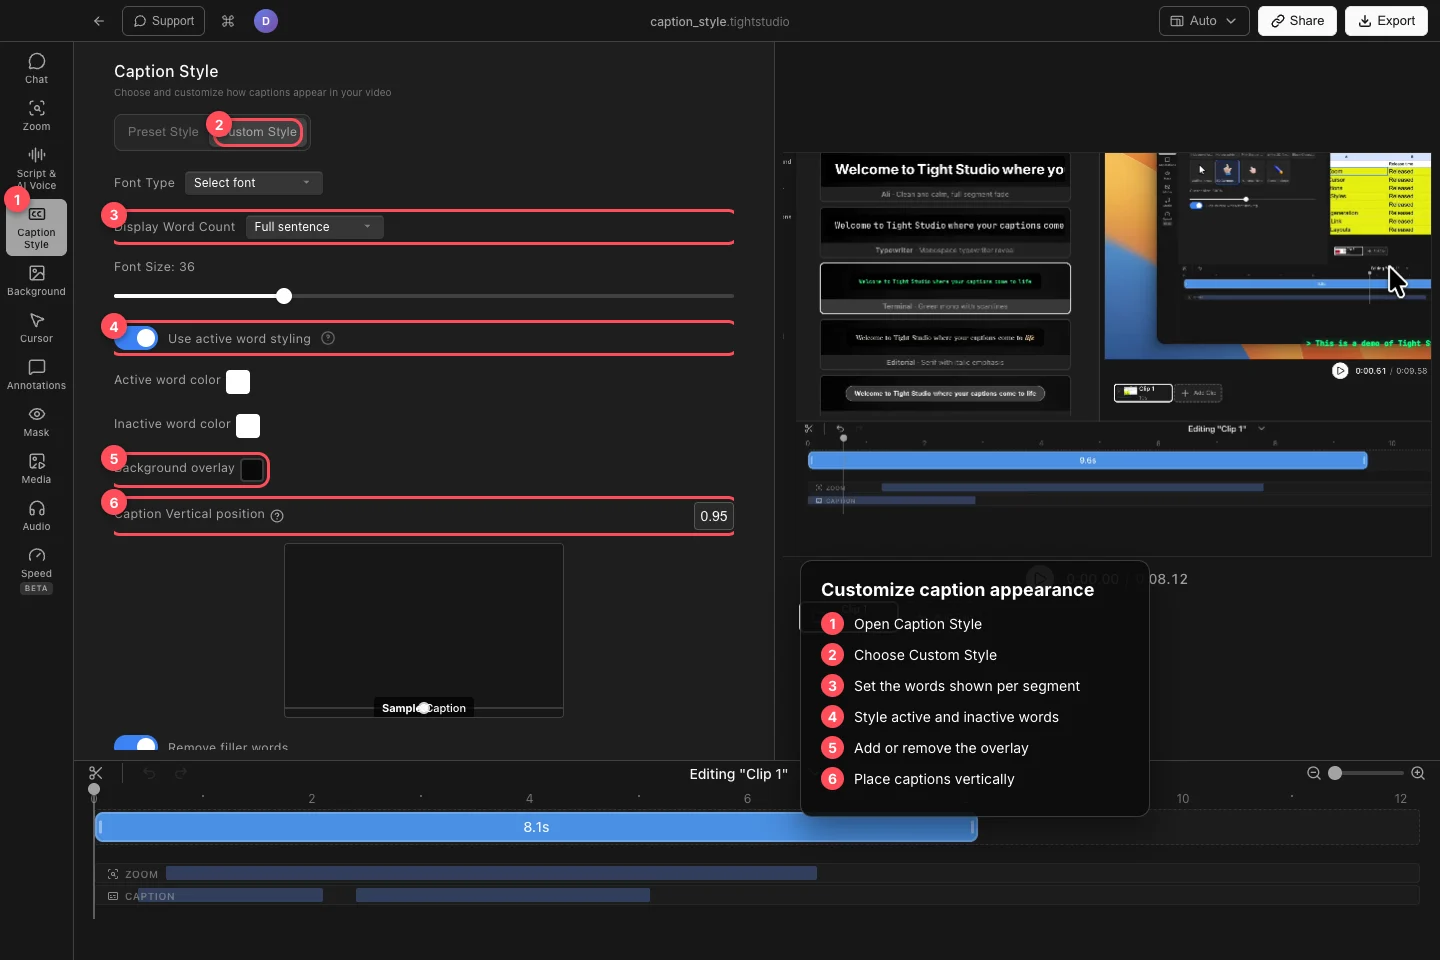
Use Custom Style to control word grouping, active-word emphasis, overlay, and vertical position. - Step 3
Style active and inactive words
Turn on Use active word styling to give the word currently being spoken its own Active word color. Set Inactive word color for the surrounding words.
Turn the setting off when every word should use the same Word color. Scrub or play the video to check contrast as the active word changes.
- Step 4
Add an overlay and place the captions
Turn on Background overlay when captions need separation from a busy recording. Choose its color, or leave it off for captions with no rectangular backing.
Adjust Caption Vertical position to move captions from top to bottom. The sample box shows the placement; check the real canvas as well so captions do not cover a face, cursor target, or important interface control.
- Step 5
Remove filler words or hide captions
Turn on Remove filler words to omit words the transcript identified as fillers from caption display. This changes what viewers see; it does not cut those words from the original audio.
Turn on Hide Captions to keep the transcript available while hiding captions in preview and export. Turn it off to restore them, or use the Disabled preset for the same hidden result.
Troubleshooting
Why can’t I see captions after choosing a style?
Confirm the active clip has been transcribed, choose a preset other than Disabled, and turn Hide Captions off in Custom Style. Then move the playhead into a timed caption segment.
Why is the active word not changing color?
Turn on Use active word styling and choose different Active word color and Inactive word color values. Play through a caption segment instead of checking only a paused frame before the first word.
Why are captions covering content in one layout?
Adjust Caption Vertical position while that layout is visible. Dynamic vertical layouts can also have a per-segment Caption position from top override in Layout & Avatar, so check the active layout segment if the global position appears to be ignored.
Why did Remove filler words leave a word on screen?
Only words identified as fillers by transcription are hidden automatically. Edit the transcript manually if a word was not classified as a filler or should be removed from the caption text.
Still stuck?
Send us a note with the project name and the step where you got blocked.