
Edit, resize, select, and delete zooms
Fine-tune zoom timing and focus, edit several zooms together, and control camera size while zoomed.
Before you start
Open the project, select the clip you want to adjust, and choose Zoom. Existing Zooms lists the effects in chronological order, while the Zoom track shows their timing relative to the clip. Changes in this panel apply only to the selected clip.
Select one zoom to edit its strength and center. Use the checkboxes in Existing Zooms when you need to multi-select zooms for batch deletion; the batch selection is separate from the expanded single-zoom editor.
- Move a zoom
- Drag the body of its Zoom-track block
- Resize timing
- Drag the block’s left or right edge
- Delete several
- Checkboxes or Select all > Delete selected
Follow these steps
- Step 1
Select the zoom you want to edit
Click a block in the Zoom track or a row under Existing Zooms. Tight Studio selects that effect, moves the playhead to its start, and expands the row so you can edit zoom properties such as Zoom Level and Auto Zoom Center.
The row shows the exact start and end times, while the timeline block displays its magnification. Play across both boundaries before editing so you can compare the current zoom timing with the interaction on screen.
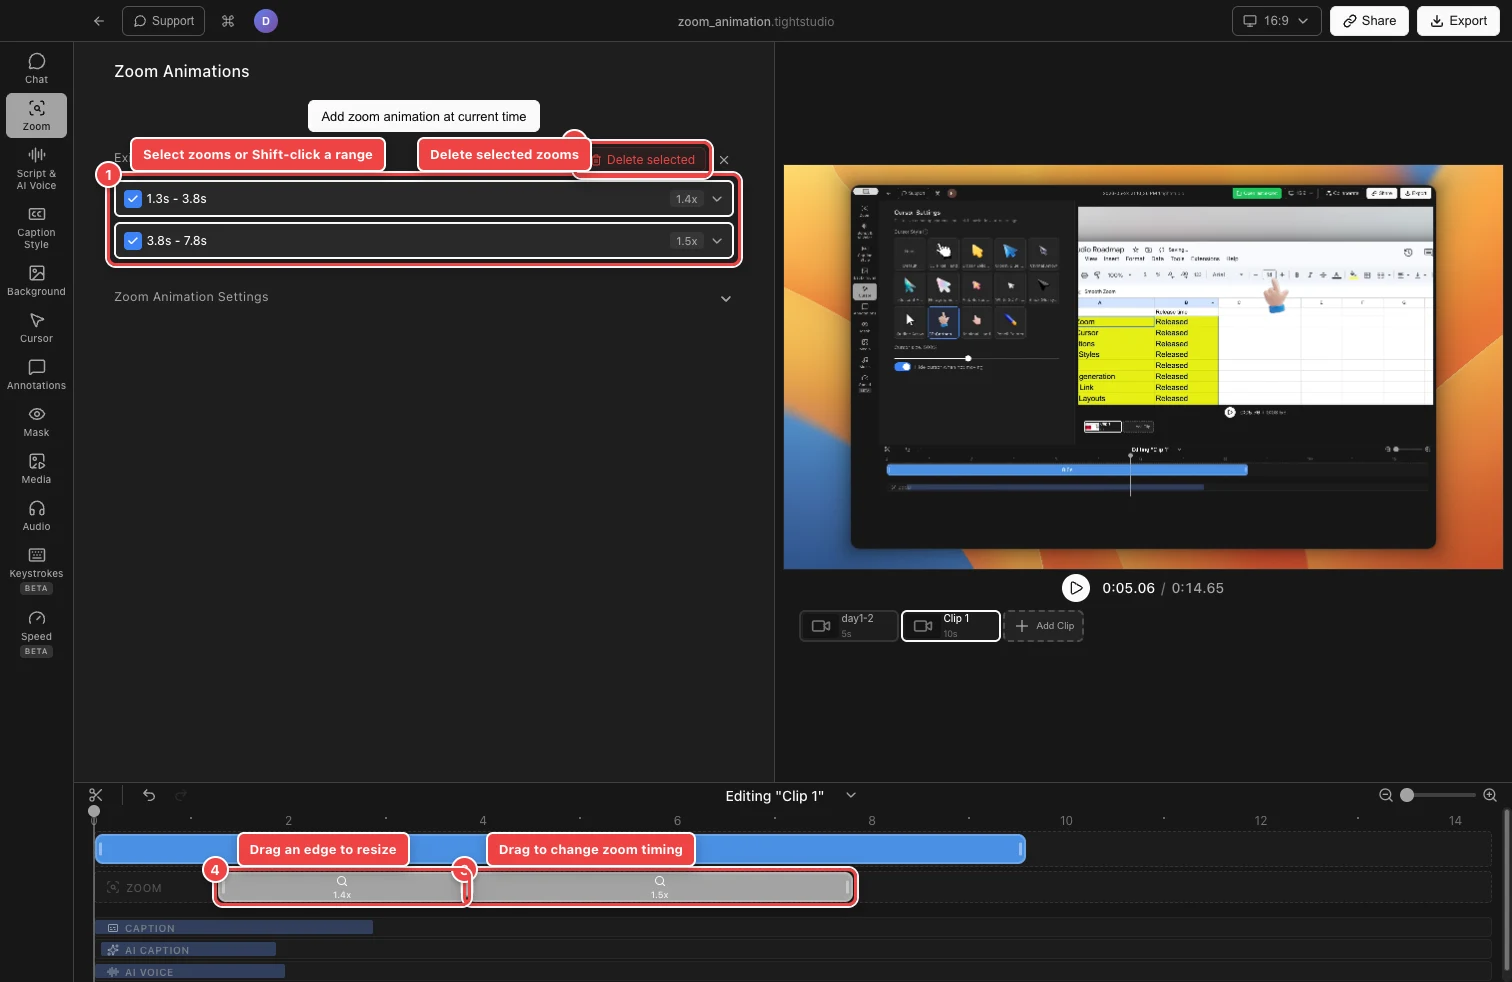
Use the list to select or delete zooms, and use the Zoom track to move or resize their timing. - Step 2
Move a zoom to a different moment
Press and hold the body of a zoom block, drag it left or right, and release it over the intended moment. The block keeps its duration while its start and end times change.
Zooms cannot overlap. Nearby valid boundaries snap together to make consecutive effects easier to align; if a move would collide with another effect, return the block to an open part of the track.
- Step 3
Resize the zoom timing
Select the zoom block, then drag its left edge to change when the effect begins or its right edge to change when it ends. Use timeline zoom to make short adjustments easier to see.
A zoom must remain at least 0.1 seconds long and cannot cross another zoom. For an automatic effect, Tight Studio recalculates the pointer-following data inside the new range after you release the edge.
- Step 4
Edit zoom strength and focus
Expand a single row and adjust Zoom Level from 1x to 5x. When several effects should use the same strength, choose Apply zoom level to all other zoom segments after setting the selected one.
Keep Auto Zoom Center on when the effect should follow recorded pointer activity. Turn it off to choose one fixed center in the frame thumbnail. These controls edit zoom behavior without changing the block’s timing.
- Step 5
Multi-select zooms and delete them
Select the checkbox at the start of each row. To choose a continuous range, select one checkbox and Shift-click another; choose Select all to check every zoom in the clip. Delete selected appears as soon as at least one checkbox is active.
Choose Delete selected to delete zooms in the batch. To remove only the expanded effect, choose Delete this zoom instead. You can also select a zoom block in the timeline and press Backspace, the default Delete selected segment shortcut.
- Step 6
Control camera size during zoom
For a screen-and-camera clip, expand Zoom Animation Settings and turn on Make camera smaller on zoom. Then adjust Camera size during zoom from 10% to 100% to choose how much the picture-in-picture camera shrinks while the screen is magnified.
The camera restores to its normal size when the zoom ends. These controls appear only when the selected clip contains a picture-in-picture camera overlay; they are hidden for screen-only and camera-only clips.
Troubleshooting
Why won’t a zoom move or resize any farther?
Zooms cannot overlap, extend beyond the clip, or become shorter than 0.1 seconds. Move or shorten the neighboring zoom, or use See more detail for a more precise drag.
Why did the single-zoom settings close?
The detailed editor requires one selected zoom. Checking several rows for batch deletion clears the single selection. Close the batch selection, then click one row or timeline block to expand its settings again.
Why can’t I see Delete selected?
Delete selected appears only after you check at least one zoom row. Use the small checkbox at the start of a row or choose Select all; clicking the main row expands it but does not add it to the batch.
Why is Camera size during zoom missing?
It is available only for clips with a picture-in-picture camera overlay. Open Zoom Animation Settings on a screen-and-camera clip, then enable Make camera smaller on zoom. Screen-only and camera-only clips do not show the control.
Still stuck?
Send us a note with the project name and the step where you got blocked.